The Cube Pro is a well-known printer from 3D Systems. It was released in 2014 in 3 different versions from 1 to 3 extruders. This printer is not produced anymore, but it’s very common to come across a deal. Some stores still have it, or professional users are selling them.
4 years after its release, the Cube Pro is in a gray zone. Looking at Amazon review, you’ll find that 47% rated 5 stars, and 53% rated 1 star. For some reasons, it seems like quite a few machines have trouble working properly.
We knew this printer had excellent mechanical design and we were interested in buying one. We found a pretty good deal on a non-working unit and decided to buy it. The unit in question had one extruder removed due to malfunction. The other extruder was still in the printer, but not working anymore.
This series of blogs show how we converted this non-working Cube Pro into an amazing printer; with open source firmware, high-end components, able to print any materials, and for a fraction of the price of the original printer!
About this blog
You can use it as a guide, or as an inspiration. We’ll do our best to be as clear as possible with the different steps involved in this transformation. Here is what we’ll cover:
- The CubePro
- List of items required
- CubePro tear down
- Carriage design
- Electronics
- Assembly
- Heated bed
- Controlled environment
The process is very similar if you are planning on using a different printer. There are very few limitations to which printers can be converted and how you change the electronics.
Why all this effort?
You might ask why would you bother about all this trouble instead of buying an already working printer? You’ll realize it very soon, but there are many advantages on building and modifying your own printer.
First, you are probably buying a non-working printer and giving it a second life. You’ll learn a lot and you’ll know your machine as if you’d built it from scratch without the hassle of ordering every individual part yourself.
Second, you can decide what you want to put inside your printer. 150°C heated bed? No problem. 500°C hotend? Sure!. Touch LCD? Yes, sir! WiFi connected? Why not?. Controlled environment? You know you want it!. Swappable nozzle? Still no problem! Sky is the limit.
Third, you’ll end up “opening” your printer to the community-driven software, supports, and materials. You won’t need to order a branded spool or use the proprietary software tied with your machine. We’ll go deeper into this subject later on.
Finally, if you are looking for a high-grade machine with many features, you’ll realize that the cost might be quite high. The time you invested will end up worthing a lot once you start modifying this printer.
The CubePro
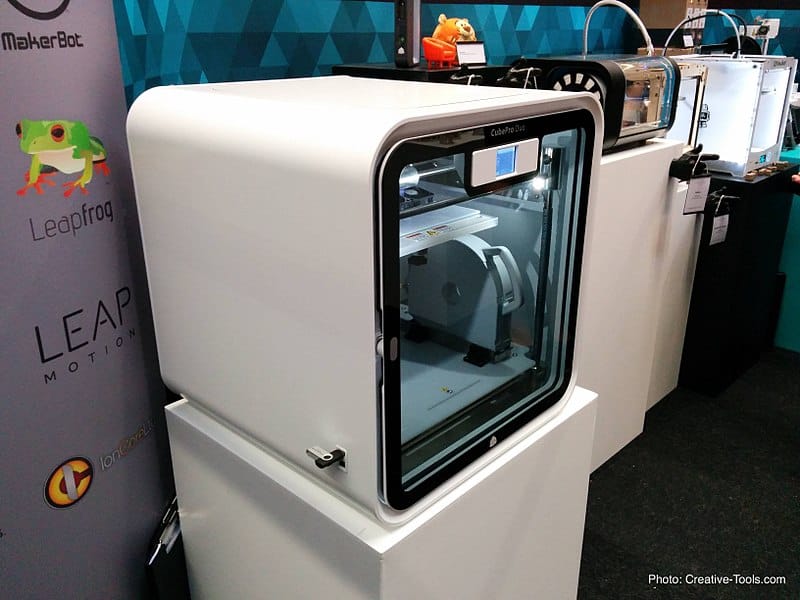
Originally from the Cubify/Cube line of consumer printers by 3D systems, the CubePro is a successor of the CubeX printer. It is a very nice looking 3D printer, thanks to the white rounded frame and simplistic design.
Features
Here are some highlights of this product:
- 24.29 x 23 x 27.04 cm build volume
- For the Duo version (the one we got), due to the multiple extruder setups, the build volume is affected by the extruders. The single version has a larger one, and the triple extruder version has a smaller volume.
- 0.10mm Z-axis resolution.
- This makes no sense, as the minimum layer thickness supported is 0.07mm, smaller than the resolution.
- 3 material options, including nylon, compostable PLA and recyclable ABS plastic.
- Maybe it was enough back in 2014, but 3 material is underwhelming nowadays. No flexible, no high temperature, no fiber reinforced, no metal powder, no wood. This is something we’ll solve when converting to open source.
- Through an upgrade kit, called the “CubePro Advanced Material”, the printer could be upgraded with flexible, wood and INF (?)
- Maximum 15mm (9/16″) per second and polymer dependent.
- I believe they meant 15mm^3. It’s not bad for a 0.40mm nozzle. However, for such a large build volume, you’ll probably want to get access to bigger nozzles to speed up the big prints. We’ll solve this.
- 280 degree C
- This sounds like a PTFE lined hotend. 280°C is a little high for long-term application. The PTFE will slightly soften and enlarge where the pressure is generated, making it progressively taper and harder to extrude. Don’t worry, once again this is something that we’ll solve.
The original hardware
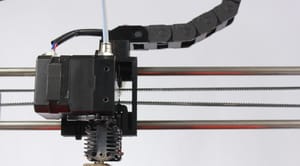
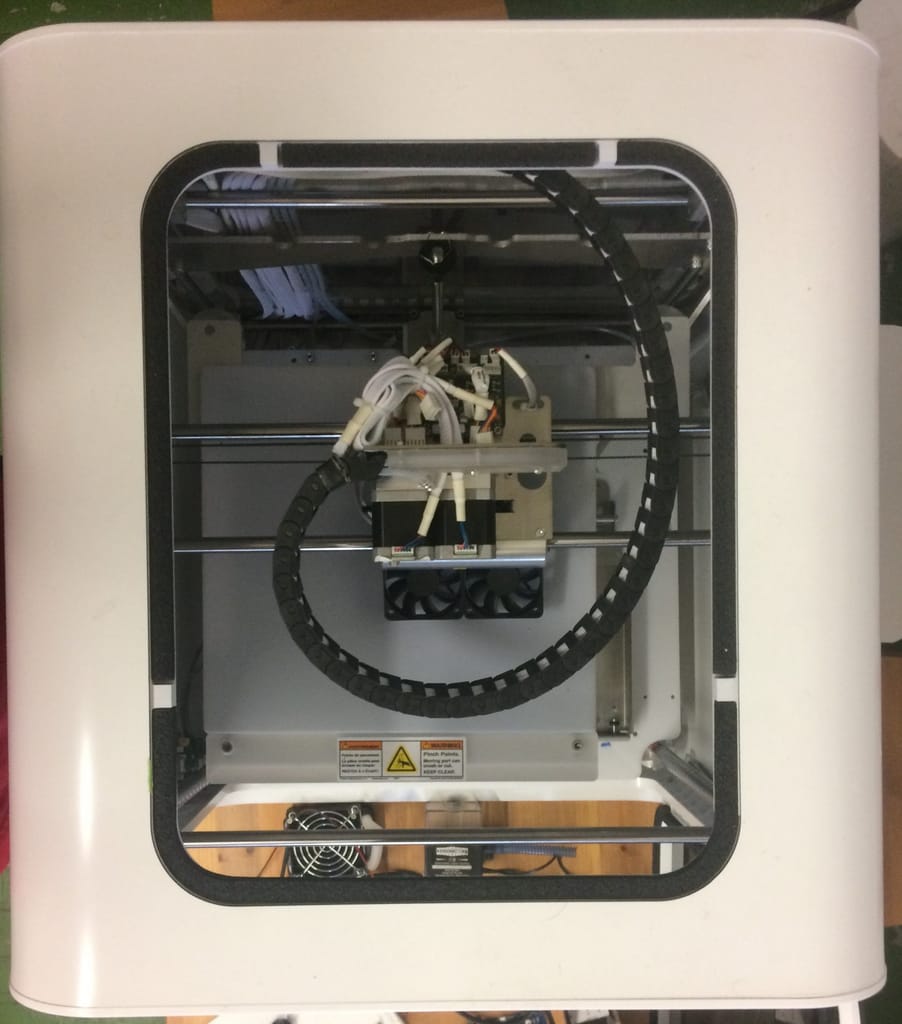
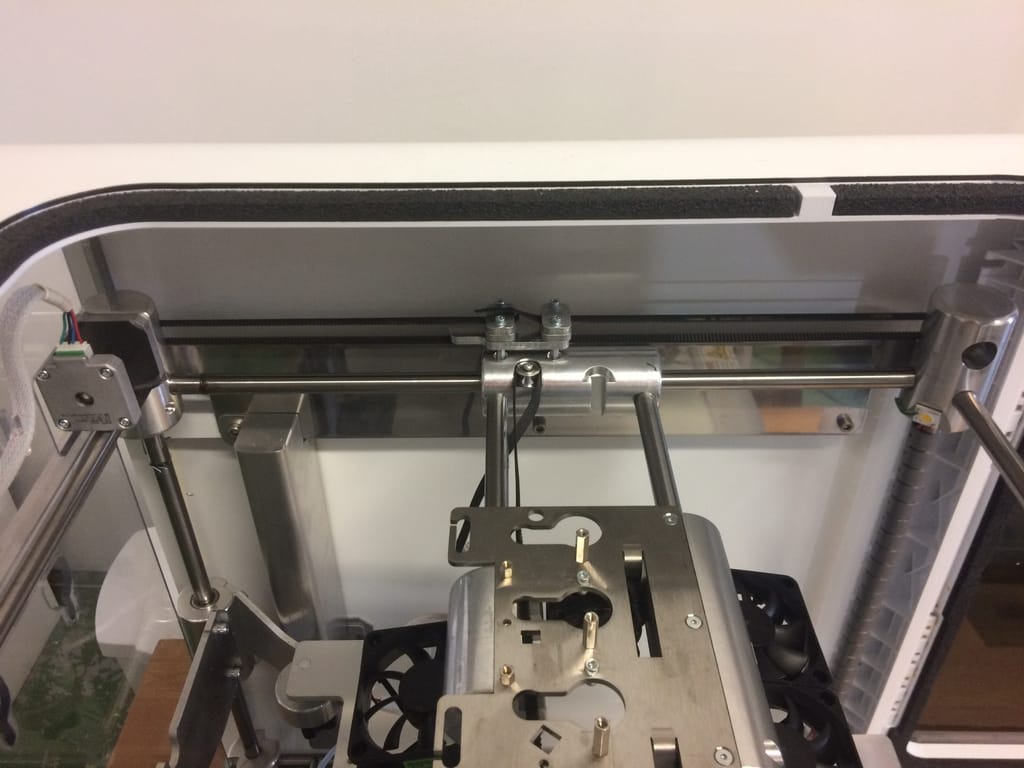
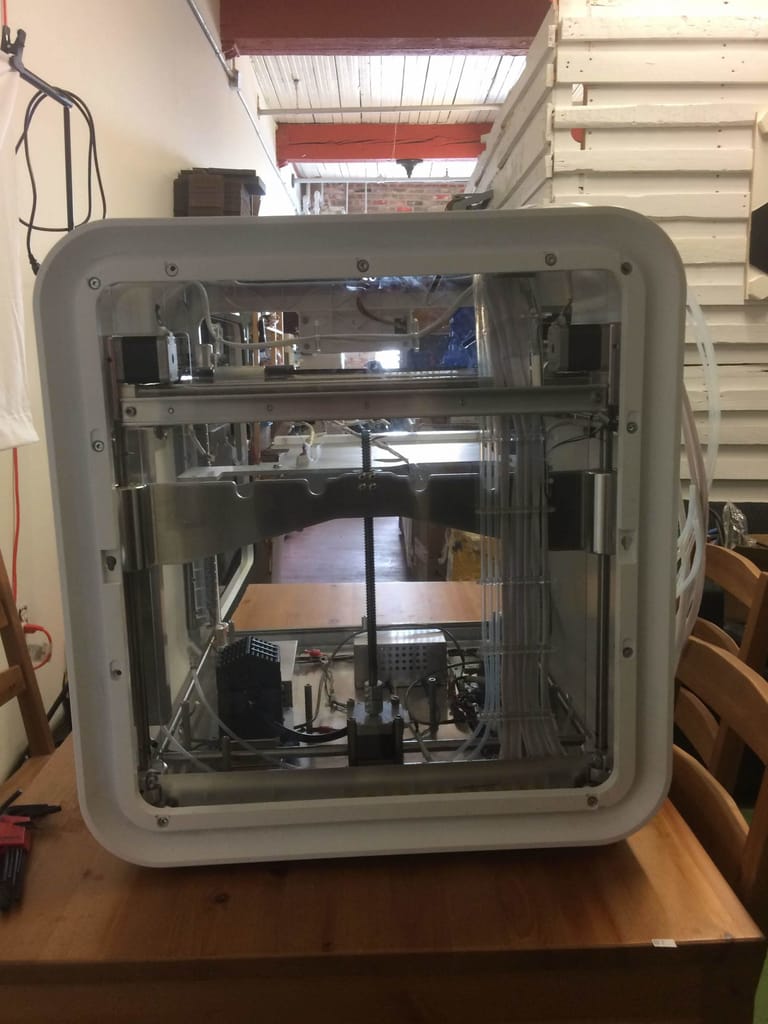
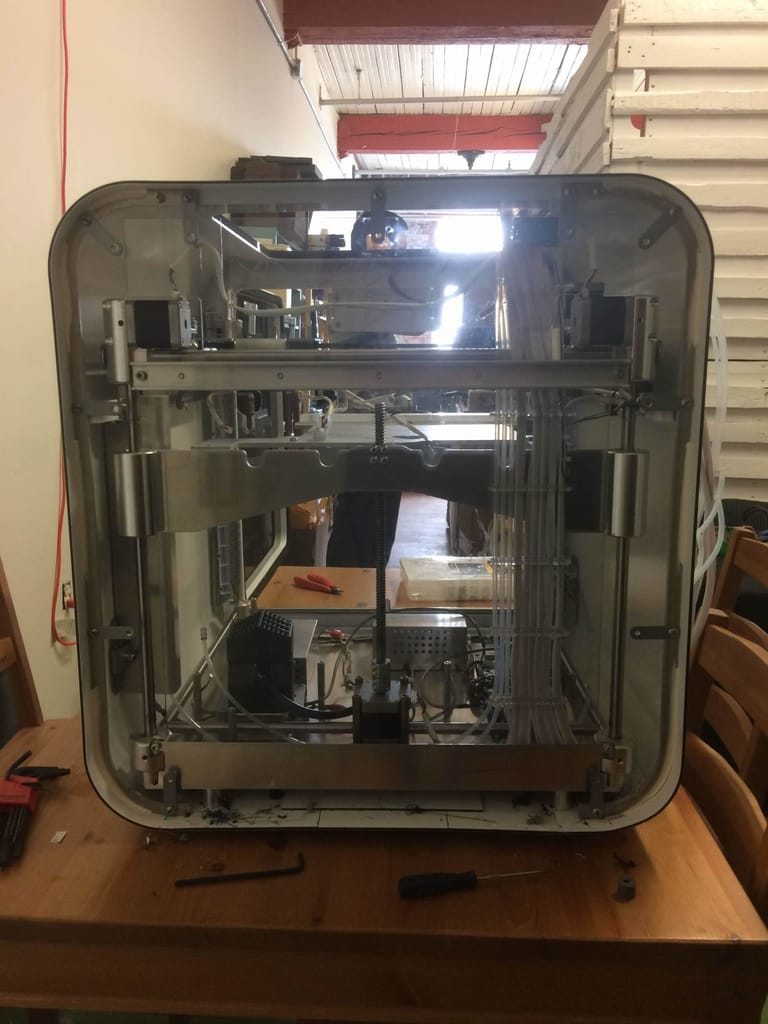
The CubePro design looks fabulous, and it’s great to work with. The solid metal frame is hidden inside the beautiful aluminium composite panels. One panel from the top can be removed as a quick access to the extrusion system. As you can see, the filament goes through the cable chain. It looks very professional compared to the traditional tube hanging free in air.
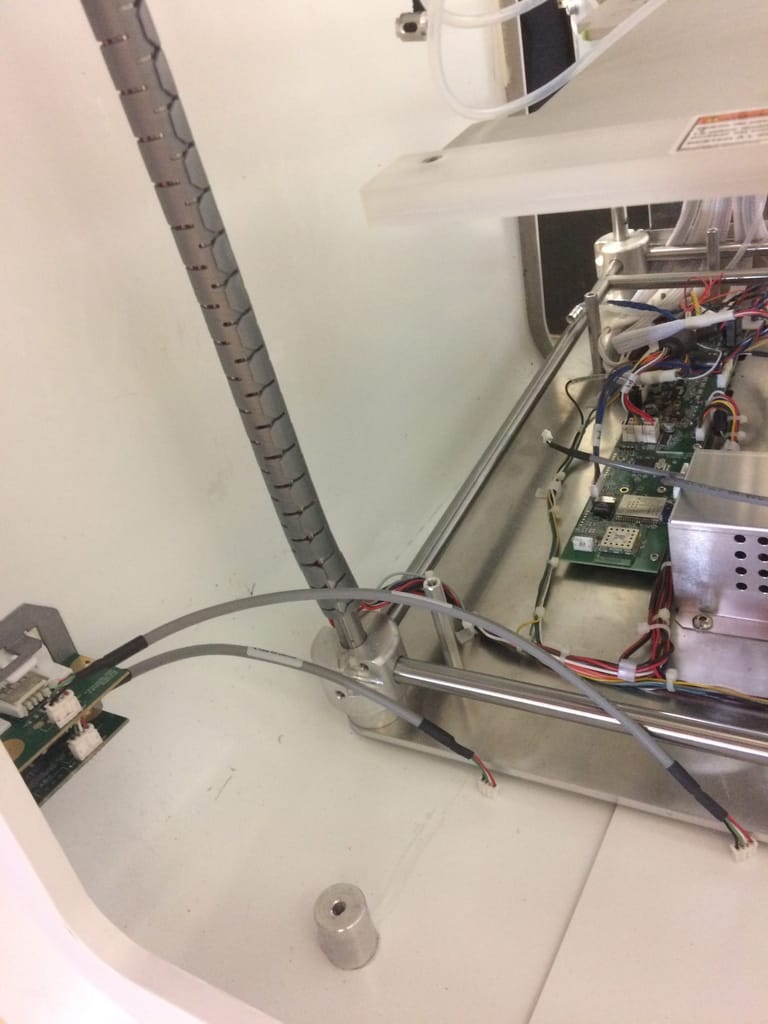
You can see that the frame is mostly made from cylindrical parts. It’s a very good design choice, as a lathe is usually a lot cheaper by the hour than a mill. Most CNC lathe with a live tooling attached can do just about anything.
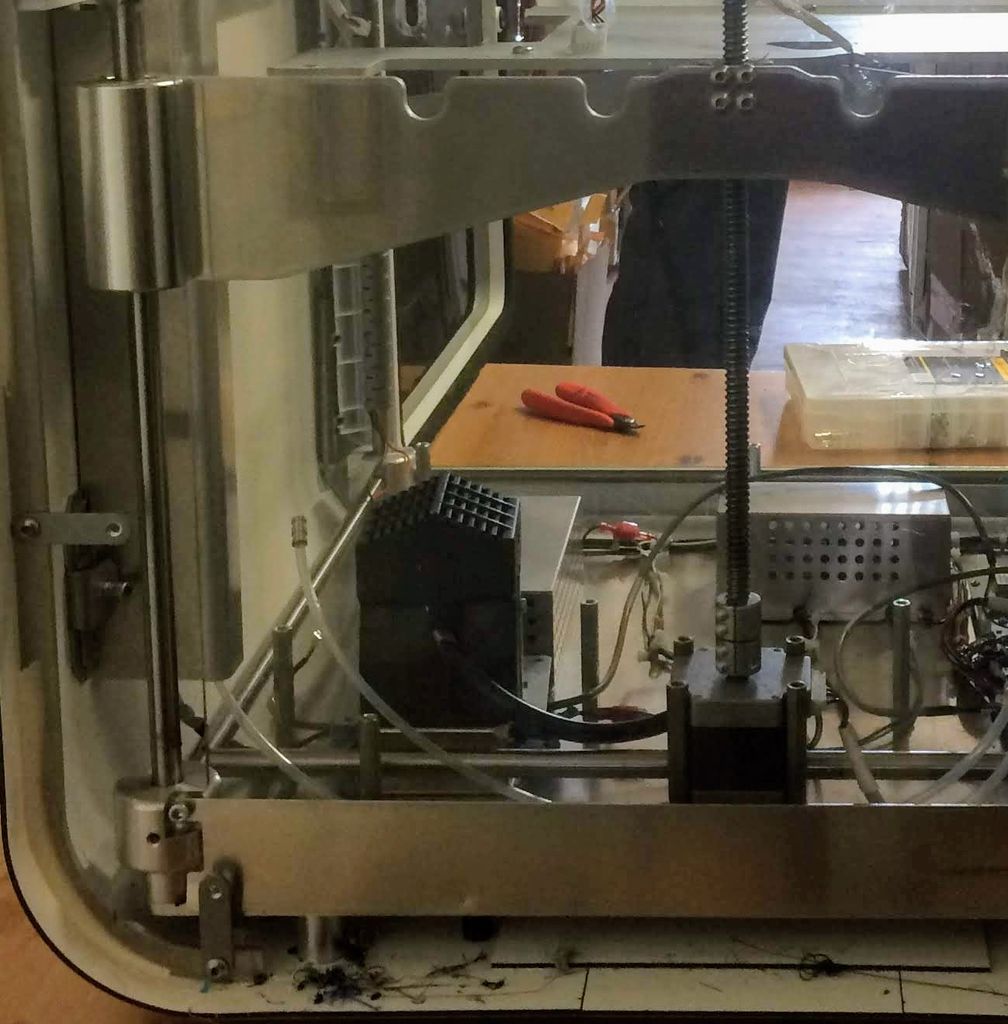
The base plate is a solid 3/16 in an aluminum plate. It holds both the frame and the electronics in place inside the case. There is a plastic plate over the electronics to keep everything clean.
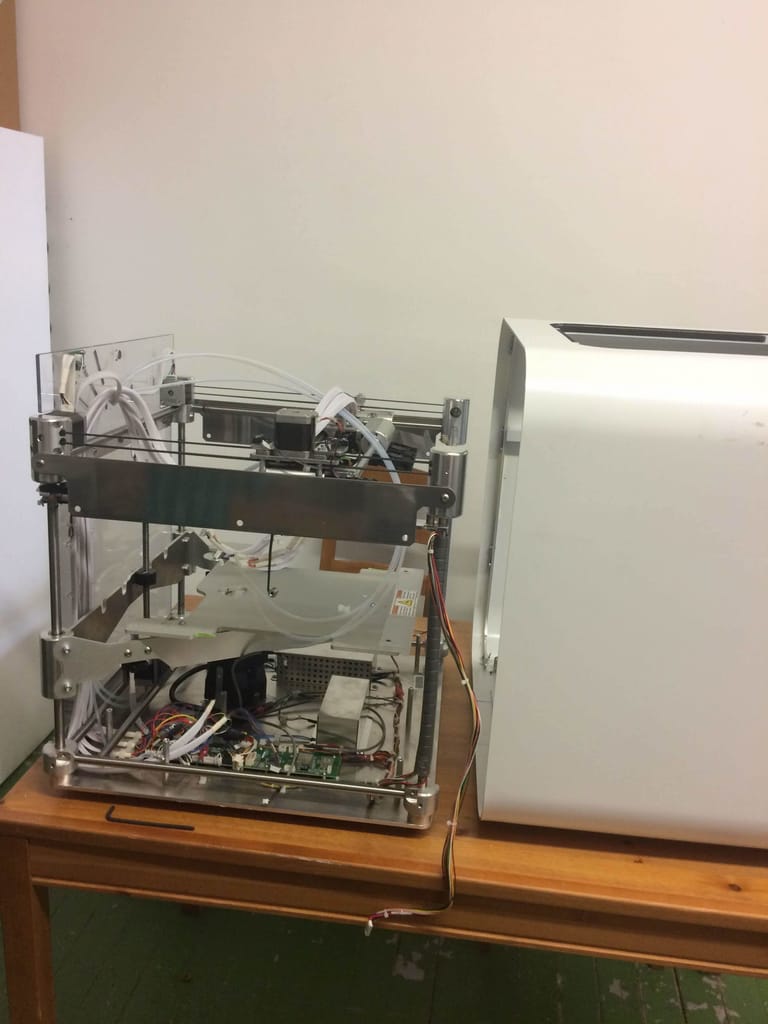
The rest of the printer is very common. Belts, ball linear guides, etc. One very interesting point is that there are no printed parts. It will allow us to increase the inside temperature without worrying about softening and weakening the frame. Many printers have printed frame parts. They are very good for lowering the costs but aren’t the best option for a high-temperature setup. Remember that even if your frame is made from a high-temperature plastic such as peek, it’s rigidity module is still way lower than any metal.
By default, this printer has no heated bed platform. ABS being one of the 3 available materials, any experienced user might get skeptical, as the suggested bed temperature is around 100°C.
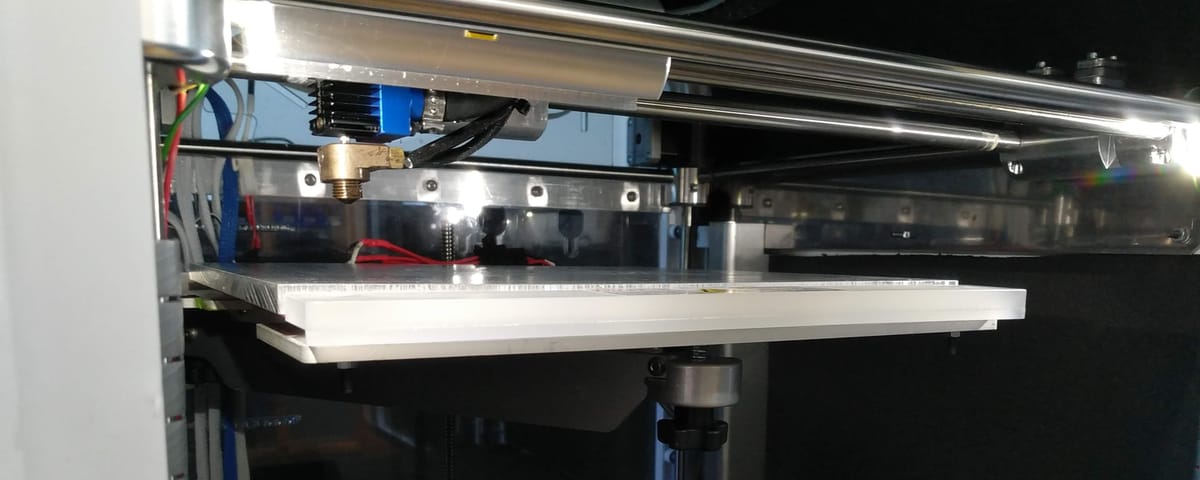
However, this printer is equipped with a heated bed chamber. This will help with warping, but probably not as much as a heated bed.
The bed is a removable thick glass with a white plastic sheet on top. The removing mechanism is easy to work with and looks very strong. The Z axis frame is made from thick sheet metal (we could call it plate) and well designed.
The electronics, interface and software are omitted in this blog for two reasons. First, the machine wasn’t working, so there was no point in evaluating them. Second, everything will be completely replaced as we don’t want to keep the closed source system for this printer.
List of items required
| Extrusion system | Price |
|---|---|
| DyzeXtruder GT | $150.00 |
| DyzEnd-X | $100.00 |
| Watercooling system | Price |
| DyzEnd liquid cooling block | $35.00 |
| DyzeXtruder liquid cooling block | $40.00 |
| Radiator | $50.00 |
| Pump | $20.00 |
| Reservoir | $25.00 |
| Tubing | $10.00 |
| Electronics | Price |
| Mainboard | $170.00 |
| 24-12 DC-DC converter | $20.00 |
| Wire | $10.00 |
| Heated bed | Price |
| Aluminum tooling plate | $30.00 |
| Silicon heating pad | $50.00 |
| Magnets | $5.00 |
| High-temperature connectors | $20.00 |
| Case | Price |
| High temperature insulating foam | $50.00 |
| High temperatures double sided tape | $10.00 |
| Total | $795.00 |
Beside is a list of the items we needed for our conversion. They are categorized so you can choose which is best for you. In our case, we are looking for the following features:
- 500°C hotend
- 150°C heated build platform
- 70°C environment
- Liquid cooled
- Compatibility with any filaments
The total is around 795$.
For our CubePro conversion, we decided to use our own products, which allows us to achieve the performances we’re looking for. Each component will be later described in a general form so you can evaluate easily whether or not you need them for your application. Highlighted in blue are products you’re able to find from our stores. We’ll provide links to other components at the end of the blog.
CubePro teardown and analysis
The teardown was quite straightforward as modern 3D printers are generally simple. A few steps required two people since some parts were quite heavy.
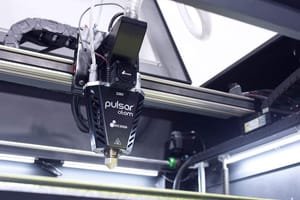
Extrusion system
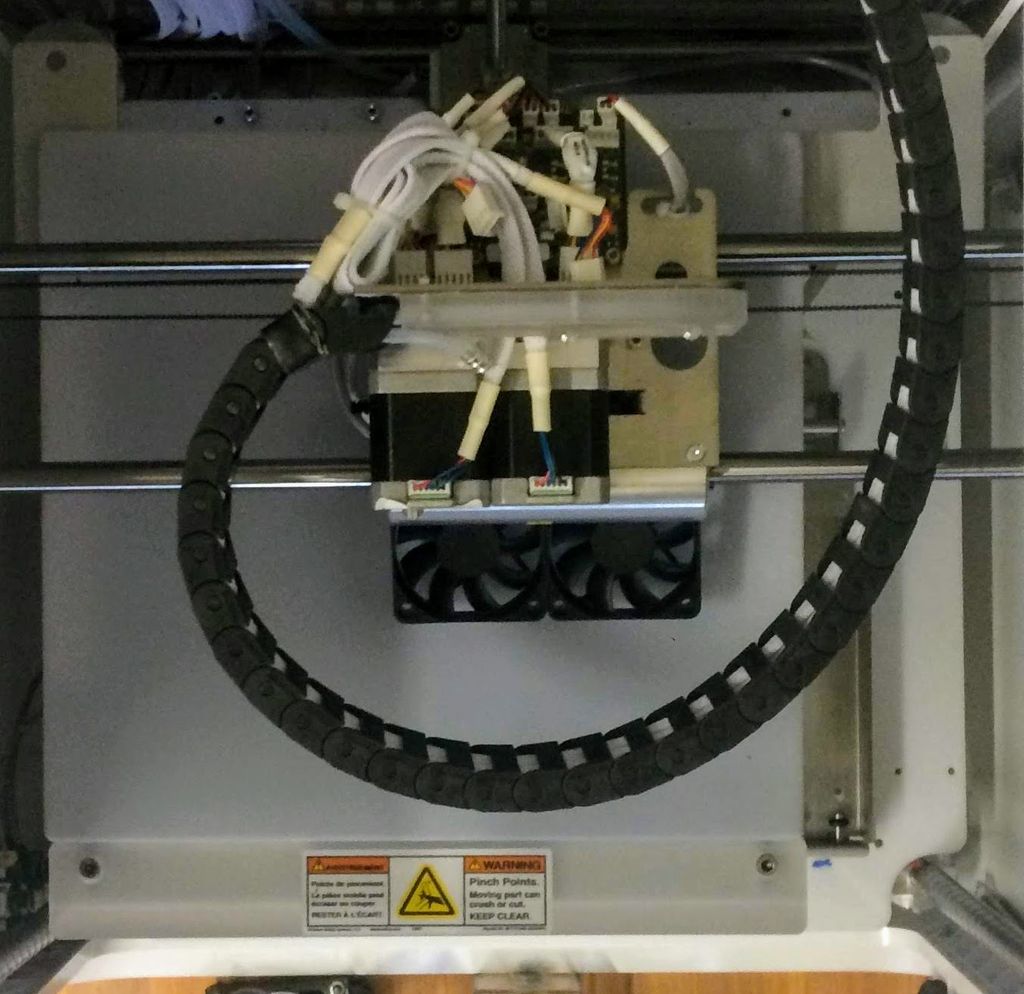
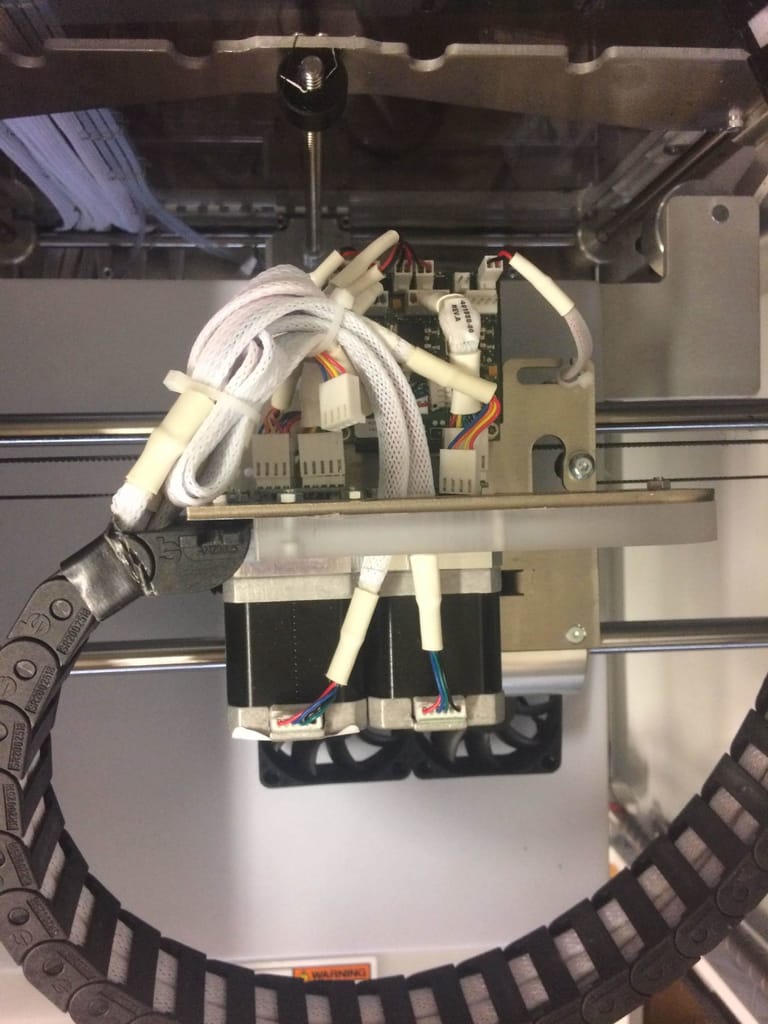
The first step is to completely remove the extruder. There are many wires going through the cable chain. We’ll be replacing them later with our own cables which have connectors.
The two extruders nicely sit one after the other. A third space is designed to accept the CubePro Trio extruder. Side note: having a single carriage design for 3 printer versions is a great idea.
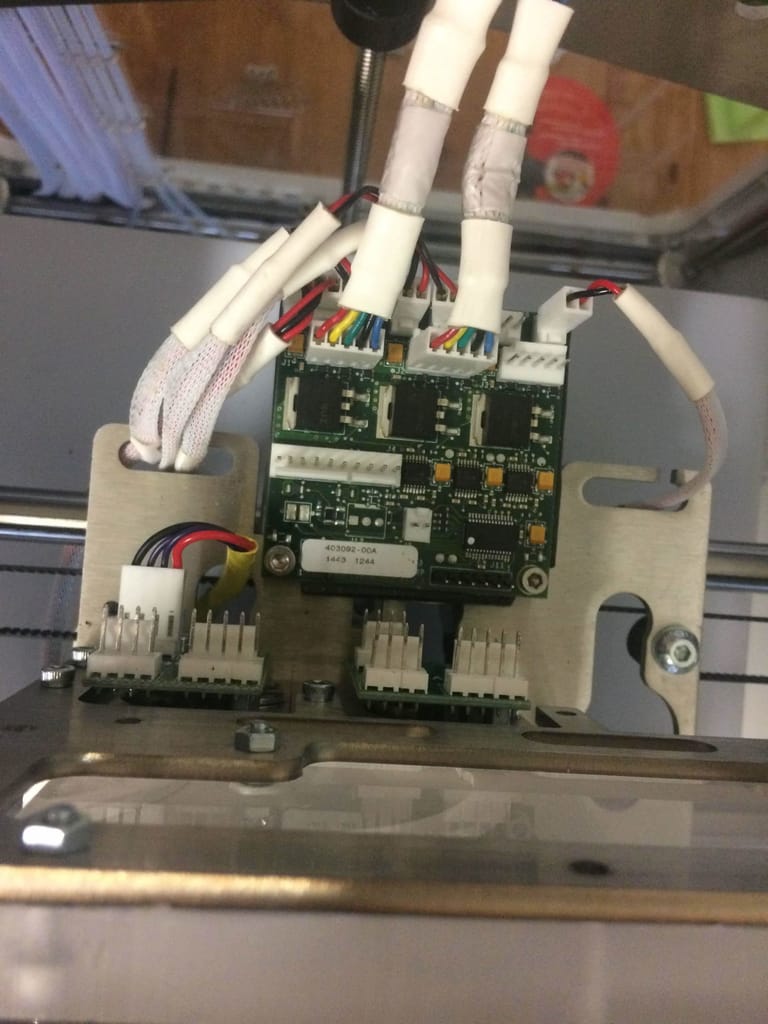
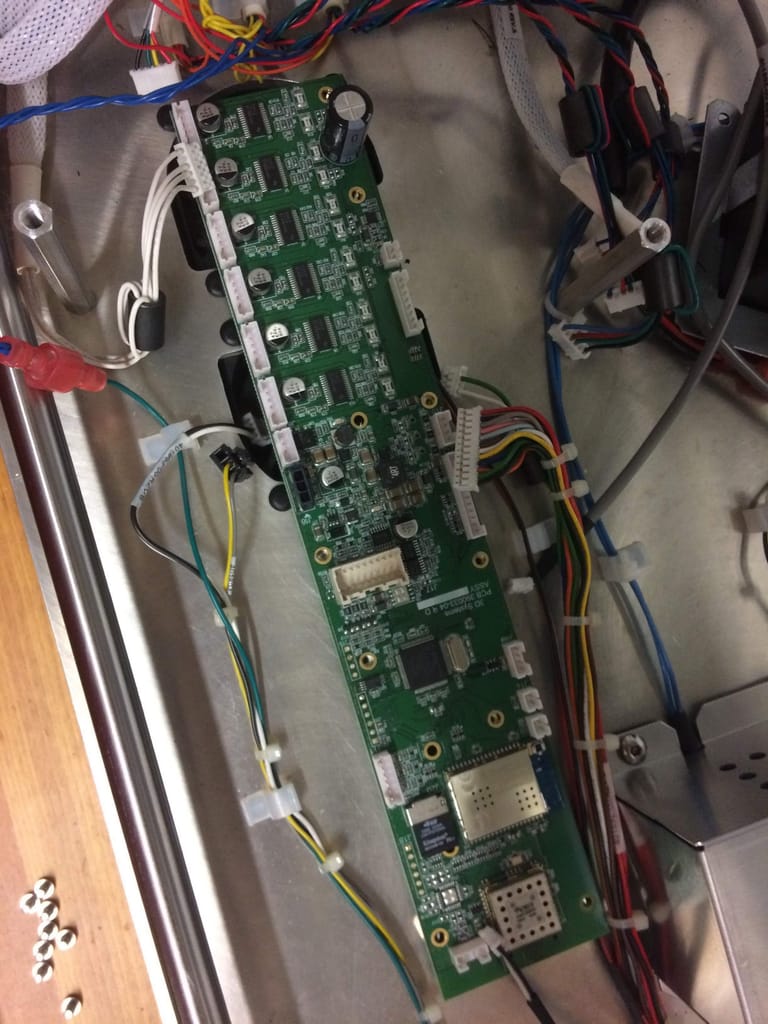
There are 3 PCBs for our CubePro Duo, one main PCB, and one per extruder. The biggest board has quite a lot of integrated circuits. The big mosfets are probably designed to manage the power for the 3 heating elements. The board has tantalum and a ceramic capacitor, much less prone to break under high temperature compared to aluminum electrolytic. This is a good (and required) design choice when circuits are under a heated environment.
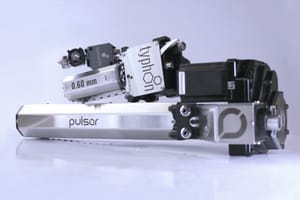
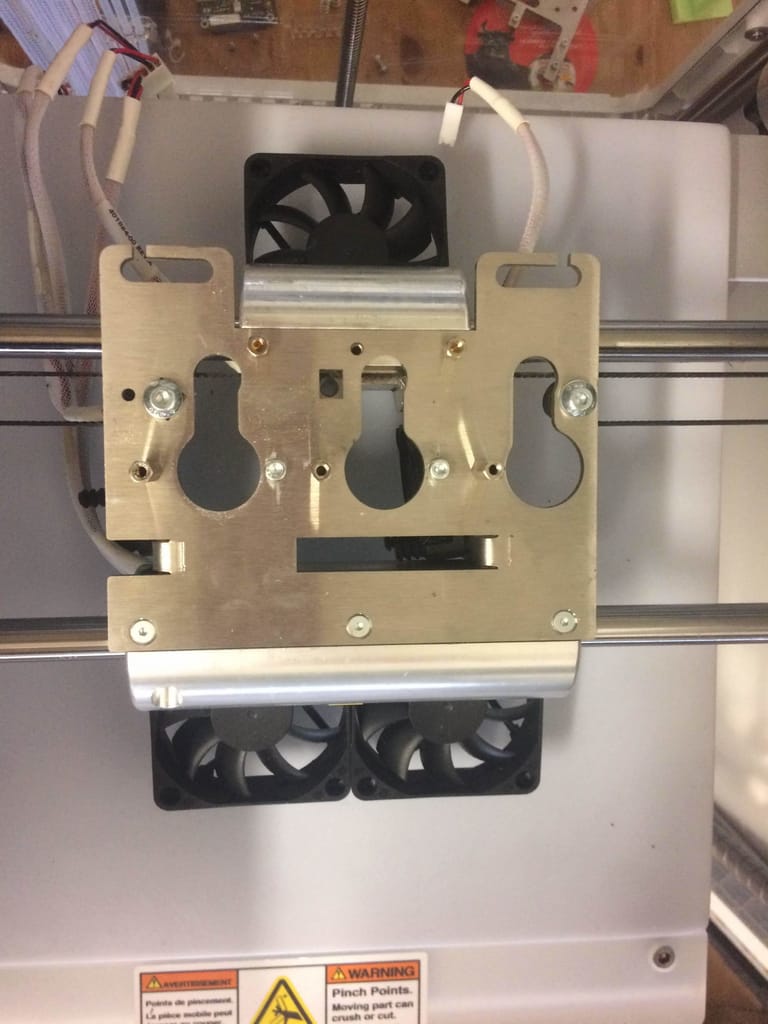
Once the extruders, hotends, and PCBs are removed, you have access to the carriage. The design is quite simple: one large cylinder with ball bearings, a smaller one, and a plate linking everything together. Sadly, the small holes are positioned in such a way that we won’t be able to use them for our system.
One possible solution would be to machine it to our requirements. However, we preferred to design our own plate to get an optimal solution. Sheet metal is very affordable, even in single quantity. We’ll also be able to keep our “no printed part” requirement for high-temperature environment.
Framing
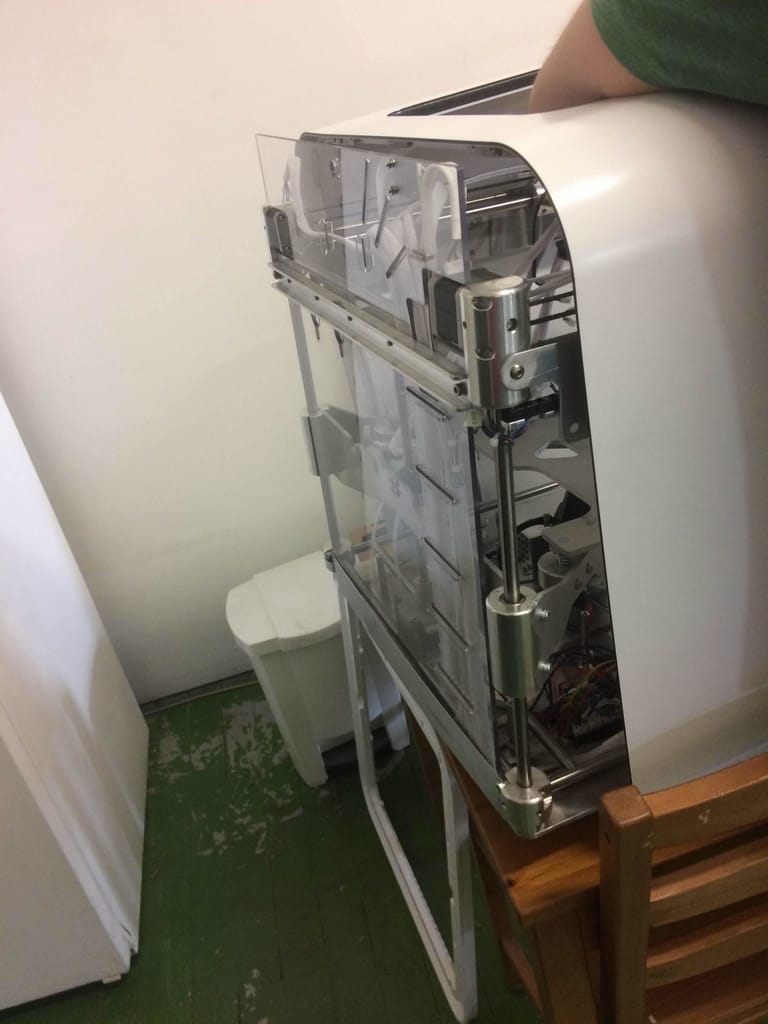
The back panel can be removed very easily, giving access to the multiple screws holding the back plastic cap. This cap helps to hold the internal frame in place, and also acts as a heat barrier when heating the inside. The front has the same panel which must be removed.
As mentioned before, the main frame is held within the shell. There are few screws on the base plate that still hold them together. Once these are removed, the frame can be slid from the back. This operation can be tricky alone, make sure you’ve got help to avoid any damage to you and the printer.
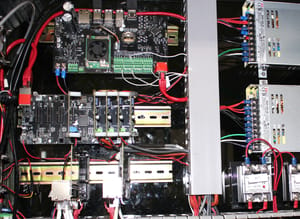
Electronics
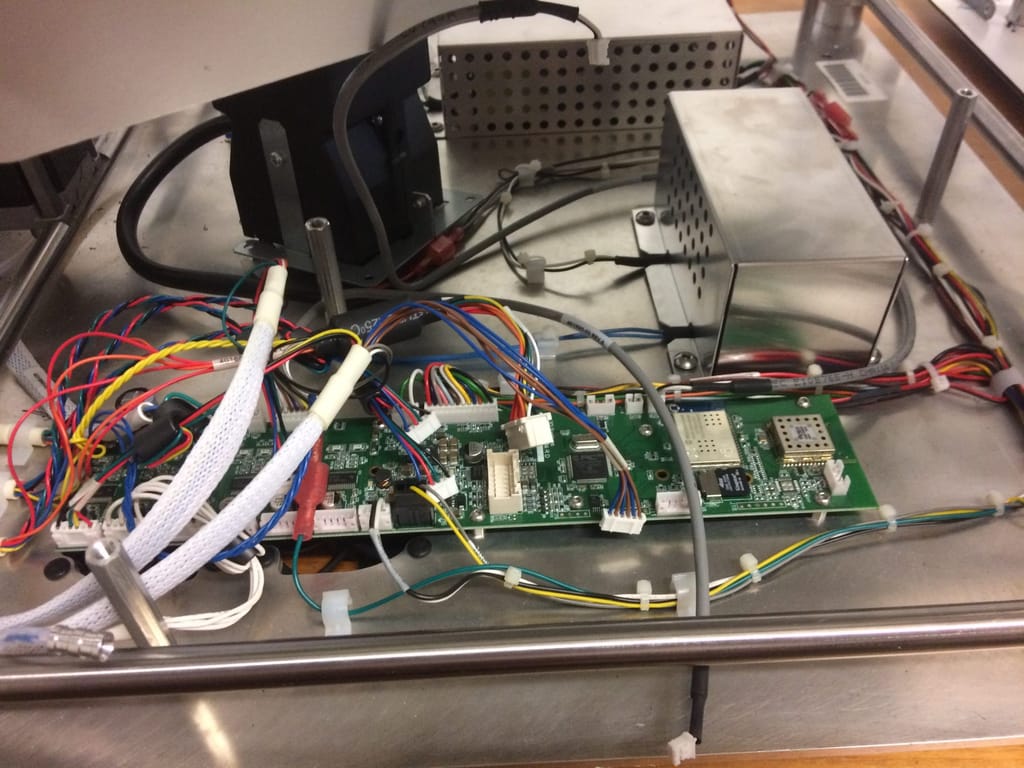
The base plate holds the electronics. There are 5 distinct elements:
- Noise reduction input
- 24V DC Power Supply
- Relay board
- Main Board
- Heater
We’ll be keeping everything, except the main board. Someone with a lot of time could probably be able to hack it and push a new firmware as it looks a lot like the compatible open-source boards, but this is not the point of this project.
All the wires connecting from the main board can be reused or changed. It’s up to the user, as they are beautifully braided and already routed. Some connectors would need some pin swapping, but this can be done very easily.
In the next part of this blog series, we will dive directly into how we rebuilt and assembled our custom Cube Pro. We will explain how we designed the carriage, how we refactored the electronics, the heated bed, and the controlled environment.





46 Comments
Wow that looks so cool what you’re doing!~
I want to know more about your results and pictures!
Thanks! Next part will be out soon with more details!
Where can I find the next part?. I have 2 of these printers that I got for free and looking into improving them.
I’ll do my best to finish a second part before the end of this month!
Great article Looking forward to the next article. Any ETA on its release.
It’s already 75% completed, I’ll definitely work on it today! Many thanks for the interest!
Also looking forward to part 2 of this as I have a CubePro Duo that I haven’t used since I bought it USED last year and never found time to mess around with it! I can see myself following your guide completely and doing the same thing as you sound like you have this all planned out perfectly. Thank you and look forward to the next blog post.
Thanks! I’m sure you’ll enjoy hacking this 3D printer, I’ll do my best to finish part 2 shortly.
Great job with this.
Got the Pro Duo on Craiglist and the extruders have been a nightmare. Everything else I can live with.
If you end up not wanting not to do a heated chamber can you get away with none of the water cooling parts or is that a necessity either way
Excellent question! The water cooling parts are only required if the environment temperature needs to be higher than around 60°C.
Any chance we can get the next part of this with the wiring done step by step to the duet motherboard?
I think it can be done. The problem is that our wiring is already modified. I’ll be able to explain how to wire everything but without the original design.
I’ve added it to my blog list.
Is there any particular components you’d like me to focus on?
Is there a way to communicate to the chip reader that the filament is always full and/or available? I would like to be able to buy bulk filament and feed it directly into the printer heads – bypassing the tube system that always gets clogged.
Sadly, I’m not an expert in electronics and bypassing this system alone while keeping the rest of the original CubePro printer is quite a hard job since the machine is closed source.
The goal of changing both the electronics and the extrusion head is to change the heart of this system, thus allowing you to use any material available. It’s more time consuming, but the reward is a reliable and open 3D printer.
Hola me gustaría mantener todas las piezas de origen excepto la placa base, es posible o hay que cambiar también el extrusor?
Creo que es posible mantener la extrusora. Sin embargo, necesitará realizar ingeniería inversa en algunos detalles, como el control del sensor de temperatura, para que funcione con la nueva placa base. En el peor de los casos, podría cambiar el sensor de temperatura por uno conocido.
since no one has asked since October… Part 2?…
Hello James,
Part 2 was published on October 29th (https://dyzedesign.com/2018/10/our-cube-pro-total-conversion-part-2/) and Part 3 on November 27 (https://dyzedesign.com/2018/11/our-cube-pro-total-conversion-part-3/).
I will have to read more. I beta tested two of these in 2017 when 3DS looked at adding nylon to the print capabilities. I ran both of them in the ground and by the end of the beta they were already starting to think of discontinuation. The company I worked for had no need for two dysfunctional printers. 3DS did not want them back so they sit in a secreted location (my garage) awaiting for this transformation.
Cool! Very nice story, thanks for sharing! Didn’t know there thought about discontinuing them so quickly… !!
I have a 3D System’s CubePro Duo printer and the material feed is a big problem. What do you suggest. If I need to rebuild the printer I would consider do it.
Yes, rebuilding the printer with open-source electronics and our extrusion system will be your best bet.
Estimado Philippe C.
Cuando contaremos con la segunda etapa de la modificación de la impresora Cube pro duo 3, ya que me tiene estreseado esta impresora, nunca funciono como se describe el fabricante, espero contar con tu conocimiento, gracias
Saludos, desde CHILE.
José Pinto.
José,
Estoy seguro de que puedes hacerlo! Si tiene alguna pregunta, no dude en contactarnos. Con gusto te ayudaremos.
I have a cube pro and you have all the reason for the problems that this printer presents, I would like to see with you if you can sell me all the complete parts, the ones that you and the others have and I will buy them all from you, say yes to be able to start my printer.
Thank you
Hi Alfonso. I’m really glad you like this blog!
Sadly, we don’t offer any kits with all the parts, we only supply the extrusion system.
The purpose of this blog is to give you a very general guide where you are free to choose the components you have available.
Thanks for the amazing blog.
I didn’t understand that how does the minimum layer thickness could be lower than z axis resolution.
What is the difference between z axis and layer high resolution?
I think it is a mistake from the original specification. Indeed, the minimum layer thickness can’t be lower than the resolution. Resolution should be at lease a few times smaller than the minimum thickness.
If you check mechanically, the stepper runs on a lead screw, and the resolution is quite high, with 1066.67 steps per mm. It considers the microstepping, but it’s still more than enough for a 70µm layer thickness.
I understood. Thanks for the information.
I really wonder how well print the machine is. I have to make a choice to sell the machine or give it a second life 🙂
Hello, I’m actually doing a RepRap conversion on my old Cube3 (the less-functional version of this machine). Do you have any experience with this particular model? After having non-stop breaks in my connections to the original extruder (I couldn’t get them to withstand the repeated back and fourth motion), I decided to try and switch to a more-conventional all-metal one with dual nozzles (called the Chrimera). However, I can’t seem to find a way to mount it to both my carriage and to the X-axis belt. I’ve been plugging away at this project for 6 months now (this is my first attempt at such a project) and I’m on the verge of having to give up, despite having everything else working as I wanted. Due to the fact these printers are of the same make and general layout I was hoping you may have insight on this. Thanks in advance!
Wade, the simplest solution (if you have a 3D printer working) would be to design a bracket, 3D print it, and then fit your new extruder. Our guide suggest using sheet metal, as it is able to withstand high temperature when heating the environment.
I’ve upgraded mine and machined and bent 10 of the required aluminum brackets. I will sell the 9 I have left for $75 each. If interested you can contact me at [email protected].
Hey guys.. I have had my CubePro for many years. I have replaced the extruders a few times, but it has been a work horse. Almost flawless. I am not a pro (far from it) just a hobbyist.
I was building two parts for my granddaughters little jeep last week. I noticed the first part printed a little off and when I tried to print the next part it would not stick to the plate at all. I tried cleaning the plate, using more glue and over and over again it just would not stick.
After some brain storming I thought maybe the chamber is not HOT enough and I believe that is the case. My question is, sense the CubePro does not have a heated bed has anyone had to replace the chamber heater?
Any suggestions? Thank you… Jim
Hi Jim,
Through this guide, we suggest using a heated build platform. Our initial tests were done with the original bed, but we quickly realized it wasn’t sticking well.
Our chamber heater is still working great, but we never go above 80°C as there are a lot of electronics and plastic parts in the heated environment.
Thank you Philippe. That sounds like a plan. Did I miss a link to your suggested Heated platform? Sorry, I don’t see it in the blog. Is it wired directly into the cube or does it need an outside source? You rock…!
My pleasure!
Yes, please check the different blog parts, there is a lot on info about how we wired and modified the heatbed.
Hey Jim,
I added a few generic heat pads below my glass bed to heat it. I can email you some pictures. Heated bed solves many issues:)
Hi Philippe, how would you compare the print quality at 10 micron & 60mm /sec speed of your retrofit CubePro to something like Prusa, Ultimaker or Ender 5 plus? The main issue is gantry design and it’s longevity to maintain the same consistency on prints without replacing too many parts, especially maintaining quality on tall prints.
Hmmm. I’d say it’s close to an ultimaker. I believe the mechanical design original from the cube pro is a little superior, having all those steel rods and machined connectors parts is very solid.
However, We haven’t tried to print at 10 µm layer thickness. We’ve done 50µm, but didn’t try lower.
The sheet metal gantry ensure a solid structure and very consistent prints.
Sorry I meant at 100 micron or 0.1mm, 10micron for FDM is not realistic. Do you think Ender 3/5 electronics so Nema 17s and a cheap Creality board would be powerful enough to drive that gantry if it was single extruder or maybe even bowden set up. The issue is how much precision is on the rods, and those bearing blocks this was not an expensive printer if you look at how many parts it has. Then there is the issue of the total weight of the X carriage, will a Nema 17 with G2 belt drive it at 60mm/sec without any running or other printing issues? Do you know what are the specs on the Z axis lead screw, as far as how many leads and pitch? Is this the same design as Ultimaker whre the Y motor is not on the X carriage?
I’m not sure about the cheaper boards with embedded driver, I would suggest a board with replacable stepper drivers.
The X axis motor is well suited for moving the carriage. We are moving at 150mm/s and never had a single problem.
Sorry, I don’t have the lead screw specs, but we have the steps/mm in the config file.
Hello. I have a question. Does the blue wire from the heater connect to J3? Do I connect to J4? I’d appreciate it if you could let me know
Yes, J3 and J4 are the wires from the AC from the original relay. The blue wires are connected to these.
I am trying to get away from using the filament cassette that uses the sensor for type and filament usage. A print of the main board could help me but if a mod is already available It would really help.
I haven’t used my Cube Pro for a few years now and want to get it going again for my son. It served me well as I did some work for the companies I have worked for as well as my own designs. I still have a few new cassettes but want to get away from the sensor.
Anything will help.
Hi Larry,
For this project, we used one of Duet3D mainbaord, they now have more powerful versions. Their website has all the documentation, schematics and other details for installing their hardware.
The mod isn’t quick, a couple of hours will be needed as it’s not a drop-in solution. But it worth it!